Thursday, November 20, 2008

Exasperation!

This life as a designer can really be exasperating. You think you have your design done, you've made it dozens of times and it all goes together with a minium of fuss. You've drawn the illustration and have written the instructions. It IS the very best you can do.

And just before you're ready to take it to the printer -- you see one little mistake! Then you think, "Maybe there are more." And on and on and on.

In my patterns -- Clementine, Amelia Earheart and Cyndi Lopper -- I show my clients a neat little elastic trick. This comes in very handy when handling elastic piecs that are 1" - 2". Hope this will help someone out:

Miss Bee’s Elastic Trick
This is one of my favorite sewing tricks. It is an easy way to handle any elastic installation, not just in doll making.

* For this application, take your 12 inches of 1/8” elastic and thread it into a yarn needle.

* On the other end, approximately ½ inch from the end, make a mark with a pencil or Sharpie marker. From that mark,

* Measure however long a piece of elastic you need. Place another mark.

* Take the needle and slide it into the sleeve casing, and gently tug it until the black mark – closest to the end of the elastic – is almost even with the sleeve edge. Tack it down, running the stitch into and through the sleeve and elastic.


Thursday, November 13, 2008

Amelia Earheart? Or the Cutest Stocking Stuffer Ever!


Finally finished Miss Amelia Earheart and have her sitting patiently in her PDF file until the weekend. I think she would be just about the cutest thing tucked into the top of a Chrismtas stocking, don't you? If you are intersted in purchasing this sweet little lady, I'll be putting her up on my website: www.missbeesdesigns.com this weekend.


Monday, November 10, 2008

Oh My Darling Clementine!


So this is the latest reindeer doll for Miss Bees Designs. The littlest reindeer if you will. I have most of the pattern written and illustrations drawn. I'm working on getting a better picture. She is pretty easy to make. But I just love her face. Check out the rest of the family at MissBeesDesigns.com

Monday, November 3, 2008

Christmas Stocking Stuffer Ideas

In conjunction with the article I just submitted to Ezine Articles, I'm giving you readers some of my tried and true ideas and where you can get them. Don't forget -- it's only 52 days until Christmas!

1) Office Supply Store (tip: we get a $10 gift card from Office Max every month. It's $10 off a purchase of $10 or more! $10 x 12 months a year is $120 worth of stocking stuffers FOR FREE every year).
  • little memo notebooks
  • markers
  • erasers
  • pencils - regular or colored or BOTH
  • note cards
  • binder clips
  • paper clips
  • pens
  • push pins
  • rulers
  • scrap booking supplies
  • crayons
  • post its

2) The Drug Store

  • candy
  • nuts
  • film
  • single use camera
  • magazine
  • book
  • little toys
  • coloring book
  • cologne/after shave
  • bath beads
  • bubbles
  • lotion
  • beauty soaps
  • bath scrubbies
  • puzzles
  • comb
  • brush
  • razor
  • barrette
  • socks

3) Craft store

  • beads
  • floss
  • sewing notions
  • fabric
  • paint sets
  • stamps
  • stickers
  • patterns
  • ribbon
  • scissors
  • buttons
  • knitting needles
  • crochet hook
  • yarn

4) Real Hardware Store

  • hammer
  • screw driver
  • pliers
  • paint brushes
  • sanding sponges
  • batteries
  • nails
  • screws
  • gadgets
  • paint stirrers (they're free)
  • washer

5) Flea Market:

  • card games
  • deck of cards
  • car games
  • harmonica
  • little stuffed animal
  • emergency blanket
  • first aid kit

6) Kitchen Store

  • wooden spoons
  • wooden spurtels
  • candy thermometer
  • turkey baster
  • hot pads
  • tongs
  • Chinese strainer
  • baskets (for burger baskets)
  • wax singles to go in baskets
  • fancy toothpicks
  • dough scraper
  • potato masher
  • measuring spoons
  • pasta measurer
  • corn cob holders
  • corkscrew
  • timer
  • fish spatula
  • tea ball
  • whisk
  • big wooden matches
  • fancy icecube trees
  • microplane
  • pepper mill and pepper corns
  • kitchen scissors

7) Grocery Store

  • candy
  • nuts
  • gadgets
  • Chinese noodles
  • little packs of rice
  • coffee
  • tea
  • beer
  • fruits
  • little bags of snacks
  • little bags of cookies

8) Book Stores:

  • books
  • magazines
  • book lites
  • book mark
  • little stuffed animals
  • CDs
  • DVDs
  • journal
  • games

9) Hobby Stores

10) Cracker Barrel: this is one of my favorite places. Great old-timey candies, ornaments, those little wooden puzzles.

Sunday, October 26, 2008

How to Tea Dye

Here's an article that I wrote for 
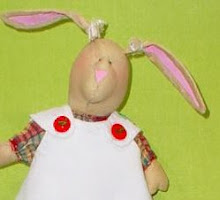
Ezine Articles. I got into tea dying when I was trying to find the perfect color for Matilda.

How to Tea Dye:
If you're looking for a little help on how to tea dye, you've come to the right place. But first - why tea dye?

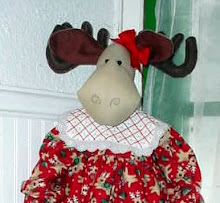
Sometimes I wake up way before dawn and I want to make a doll or a Christmas ornament right NOW! I live at least 40 minutes from the closest fabric store and they're not even open yet. While I might not always have commercially tea dyed muslin on hand to make my bunnies and reindeers, I always have yards and yards of the regular bleached and unbleached muslin that I can convert to the perfect color with tea dye.

Other Reasons to Tea Dye:
1. It's an easy and inexpensive way to mute down fabrics that look too bright or too new.
2. It's a way of bringing together unrelated fabrics.
3. It's a way to make any fabric look older or more antique.
4. It can mask minor stains.
5. The tea dye process is more forgiving than mordant dying, although not as predictable.
6. The tea dye is non-toxic.
7. It doesn't irritate skin.
8. It can be done in stages: dye it, dry it and if you're not happy with the result, dye it again or bleach it out.

Tea Dye Quirks:
1. Tea dye only works on natural fibers such as cotton, silk, linen, wool. It should also work on satin (woven from silk) and rayon. I have never tried it on rayon, but in general, rayon takes dyes very well.
2. It can be difficult to get large pieces of fabric to tea dye evenly. But personally, I like the subtle mottled look and sometimes the uneven coloration is perfect for the project at hand.
3. Tea-dying will NOT take a white fabric to off white, eggshell or ecru. It is a color all its own -- a shade of rusty brown - although it can be very light.
4. One lovely trait of tea dying is that if you're not happy with the color, you can let it sit longer (for darker and more intense results) or you can mix a little bleach in the rinse water to lighten or remove the color.
5. Once the tea dye is set, it is semi permanent. That means that the color won't wash out easily, but it may come out when washed with a bit of bleach or an "oxy-clean" type product. While I wouldn't use tea dye for t-shirts or other clothing that will get washed frequently, it's perfect for the tenderly treated items like dolls and quilts.
6. Don't confuse tea-dying with tea staining. Tea dying is when an item will be submersed in a tea dye bath. Tea staining is done by applying the tea dye with a rag or paint brush.
7. Tea dyed fabric will dry lighter than it appears when wet.
8.Matching one batch of tea dyed muslin to another is almost impossible. Make sure you do enough yardage to complete your project.

Tea Dying Instructions:
1)First, gather the materials needed:
*Natural fibered fabric or items (gloves, lace, floss)
*Tea bags (orange pekoe or black pekoe. Use the cheapest bag tea that you can find)
* Boiling water
* Glass or stainless steel container

2)It's a good habit to start any dying project by washing the item/yardage with a mild detergent and rinsing it in cool water. This ensures that the sizing is washed out and won't inhibit the item from taking on the dye as evenly as possible. Let it sit in the cool water as you make the tea dying mixture.

3) Start by boiling water. A general rule of thumb is 4 cups of water for 1 yard of fabric. When the water boils, remove from the heat. Add 2 tea bags for every 8 ounces of water. So for 4 cups of water, you'll need eight tea bags. That will make enough tea dye to tint one yard of fabric.
Let the tea bags soak for 5 minutes. DO NOT ADD THE FABRIC YET.

4) After the steeping, your tea dye concoction should be a very dark reddish brown. Pull out the tea bags. Depending on the quality of the bag, you can gently squeeze it to get out the last bit of tea, but be careful the bag doesn't break and drop bits of soggy leaves into your tea bath.

5) Take the wet yardage and gently squeeze out the excess. You don't want to add so much water that it dilutes the tea dye. Submerge it into the tea. For a more even dying, gently swish and swirl your fabric periodically. However, if you want your fabric to take the dye unevenly for a more interesting look, just leave it creased and wadded.

6) When you think your fabric is dark enough, remove it from the tea dye mixture and rinse in cool water. During the rinsing process, a lot of the color will flush out. The lovely thing about tea dying is that you can go ahead and drop it back in to the dye if you want it darker.

7) There are two ways to set the color. #1. Fill another container with fresh water. Make sure the container is big enough to hold your tea dyed fabric. For every gallon of water, add ½ cup of white vinegar. Let your fabric sit in this mix for about 15 minutes. Then rinse the fabric and press it dry. #2. When you achieve the color you want, toss the fabric in the dryer set on its highest setting. When it's almost dry, remove it and smooth it out with an iron set at the hottest temperature the fabric can handle.

There is only one caveat that I've ever heard about tea dying: The pronounced amount of tannin in the tea dye can compromise the fibers of the fabric and it will rot away. The tannin will supposedly cut the longevity of the fabric to 30-40 years.

I hope you will try your hand at tea dying. And once you have your fabric dyed, pressed and ready to sew, go to http://www.missbeesdesigns.com for a pattern that I designed specifically for tea dyed fabric.

Thursday, October 23, 2008

Miss Bee's Free Yoyo Tutorial!

I learned to sew in 1967, at the knee of Mrs. Sophie Lahner, my Hungarian neighbor lady. In the 70's, I branched off into making quilts. Yoyo quilts were the rage, many made in the hideous rusts and avocado greens that we were also using on our kitchen appliances and shag carpeting.

It seemed simple enough, but as hard as I tried, I had terrible, ugly results. Not pleasant. Not easy. Not quick. So I threw in the towel and banished them forever.

But then -- 40 years later -- I learned THE TRICK. That's right. There's a little trick. And here is my tutorial to teach you exactly how to make a fabric yoyo.


  1. Gather Your Materials. Fabric: Now is a good time to use up all those scraps you've been hoarding. Medium and lightweight fabrics are ideal, as they are easier to pull down into tight yoyos. Quilting thread or embroidery floss: DMC floss is made up of six strands of thread. Snip off a piece of floss about 16"-18" long. Separate the threads, and then put 3 of them back together. This should be strong enough to stitch most fabrics. Something to trace around to make your circle. Keep in mind that your finished yoyos will end up being a little less than half the diameter of the cut circles. Coffee and tea cups work great as well as drinking glasses and saucers. Anything that is round. As you can see -- I just used a roll of painter's tape that was lying on the coffee table. Something to mark your fabric with a pencil or fabric marking pen. Since this Christmas tree garland isn't going to be washed, you could use a regular ball point pen or a felt tipped marker. Whatever is handy. OPTIONAL: Round up some miscellaneous buttons, bells, silk flowers or other little trinkets to use as embellishments in the center of you yoyos. This is a perfect place to use up those random buttons left over from other projects or those really ugly buttons you hacked off your sweetie's favorite shirt just before you threw it away. Jars of buttons are always lurking in corners at thrift stores. Also, regular bags of craft buttons can be bought for cheap at the fabric stores. Shrinky Dinks make cute centers as well.

  2. Trace Circles all Over Your Fabric: Squeeze in as many circles as you can. I find it's easiest to alternate between tracing and cutting, so I don't get bored. It is the perfect, mindless task to do while you're watching a DVD or your favorite TV show.

  3. The Yoyo Trick: The Trick is this -- the bigger the stitch -- the tighter you will be able to pull the center of the yoyo. The smaller the stitch, the more little gathers you'll have to pull into the center, and there will be a gap about the size of a dime in the center of the yoyo (no matter how hard you try to pull it). It's okay to have a gap in the center of your yoyo, if that's what you want. I like it because it's the perfect place to nestle an antique button. If you want the gap in yoyo, make your stitches about 1/8" long and about 1/8" apart. If you want no gap and your yoyo closed up in the center, make your stitches at least 3/8" long and 3/8" apart (more if you're using heavy fabric).
    Photobucket
    4. Sewing Around the Fabric Disks: Making your first few yoyos may feel awkward, but here are three tips to make it easier. 1) Don't bother marking a fold line. The fabric is going to roll to the wrong side differently with each inch of the outside edge, because it is the nature of the circle. 2) Don't bother to pin the folded/rolled edge in place to sew it. You'll just get a handful of pin pricks. 3) If you get a few little tucks when you're stitching you gathering stitches -- who cares? Nobody will see those little tucks once it's gathered into a yoyo.


    5. Start the Stitching: Take three strands of floss and tie a knot on the long end. With the wrong side of the fabric facing up, turn under the smallest amount of raw edge that you can handle. In the beginning, it might be as much as a quarter of an inch, but as your fingers get more adept, you'll work your way down to about 1/8th inch. Push the needle from the right side (underneath) to the wrong side (the side that's facing you) through the turned down edge. The knot will be on the right side of the fabric. Pinching the rolled edge between your thumb and forefinger, take a few stitches. As you work your way around the edge, fold down just enough edge to do a few stitches at a time. If you are right handed, you'll probably find it easier to stitch counter clockwise. If your left handed -- clockwise. Once you get back around to your knot, push your needle to the right side of the fabric.
    Photobucket

    6. Time to Make the Yoyo! Grab the knot and start pulling the tread, gathering up the yoyo. Pull the knot until you have about 2" of excess floss, then start to gather from the needle end. Keep pulling on both ends of the floss until your yoyo is gathered as tightly as you want to be. If your yoyos are becoming a Christmas tree garland and not a quilt, just tie the ends of floss together in a tight knot, then trim off the excess floss.


    Photobucket
    7. Embellishing -- an Option: If you want to embellish your yoyos with buttons, bells or trinkets, now is the time. I take three strands of embroidery floss that I cut 36" long, and double it over. Starting on the flat side of the yoyo, I push the needle through the back and through the center of the gap on the gathered side of the yoyo. String on the embellishment, and go back the way you came to the flat side of the yoyo. Tie in a secure knot. Trim off the excess thread.


8. Turning Your Yoyos into a Christmas Tree Garland: Sew the yoyos together on the outside edge, using three or four stitches by hand and strong thread. You can also use the bar tack stitch on your sewing machine.
Photobucket

And that's all there is to it. After you make a few, it will be a quick and easy project.


Tuesday, October 21, 2008

Introducing Miss Matilda


This is where it all started. I can't believe she is finally done and the pattern is printed and packaged in her envelope. What an undertaking. I learned so much along the way.


It wasn't too long ago when I was swearing that I would never, ever design a doll this big again, but yet I have a big bunny doll in the works. I think I'll name her Bernice. And I'm also thinking about adapting this reindeer pattern for a boy reindeer named Allowishus.


Working on such a large scale is difficult, but you've got to admit Matilda is pretty impressive. Right now, I think she's the best reindeer doll pattern out there.


Next project to finish up? I'm in the middle of two right now: Amelia Earhart and Cyndy Lopper the Christmas bunnies, and my embroidered borders for dish towels and bed linen. Plus I'm also writing some articles on dollmaking and Christmas.